摘要 工厂模式是最常用的设计模式之一。这种类型的设计模式属于创建型模式,我们在创建对象时不会暴露创建逻辑而是直接给出“产品”。
正文 版本说明 使用 CocosCreator 的 2.1.3 版本开发。 建议先下载完整项目工程,搭配文章“食用”!源码链接在文章最下方。
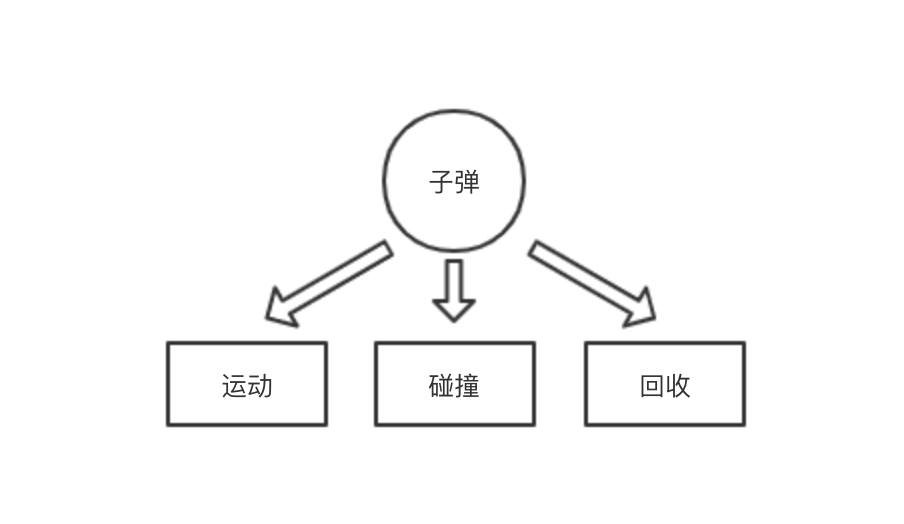
子弹类型枚举 我们上一部分已经实现了子弹的方法,也就是说子弹一旦被创建,它将按照逻辑自运行。
export enum BulletType { R = 0 , M = 1 , F = 2 , B = 3 }
对应声明的节点池与预制体数组,这样就一一对应了:
@property ({ type : [cc.Prefab ], tooltip : "子弹预制体" }) bulletPrefab : cc.Prefab [] = []bulletPools : cc.NodePool [] = []
节点池的创建 我们有四种子弹,所以要创建四种对象池,每种对象池对应一个子弹类型。cc.NodePool 在 new 时是可以传入复用节点类作为参数的。先导入四种子弹对应的类:
import { Bullet _0 } from "./bullet_0" import { Bullet _1 } from "./bullet_1" import { Bullet _2 } from "./bullet_2" import { Bullet _3 } from "./bullet_3"
初始化节点池:
this .bulletPools [BulletType .R ] = new cc.NodePool (Bullet _0)this .bulletPools [BulletType .M ] = new cc.NodePool (Bullet _1)this .bulletPools [BulletType .F ] = new cc.NodePool (Bullet _2)this .bulletPools [BulletType .B ] = new cc.NodePool (Bullet _3)
封装一个装入指定类型和数量子弹的方法:
putBulletInPool (type : BulletType , num : number ): void { for (let i = 0 ; i < num; i++) { this .bulletPools [type ].put (cc.instantiate (this .bulletPrefab [type ])) } }
让我们装入子弹:
this .putBulletInPool (BulletType .R , 300 )this .putBulletInPool (BulletType .M , 200 )this .putBulletInPool (BulletType .F , 100 )this .putBulletInPool (BulletType .B , 50 )
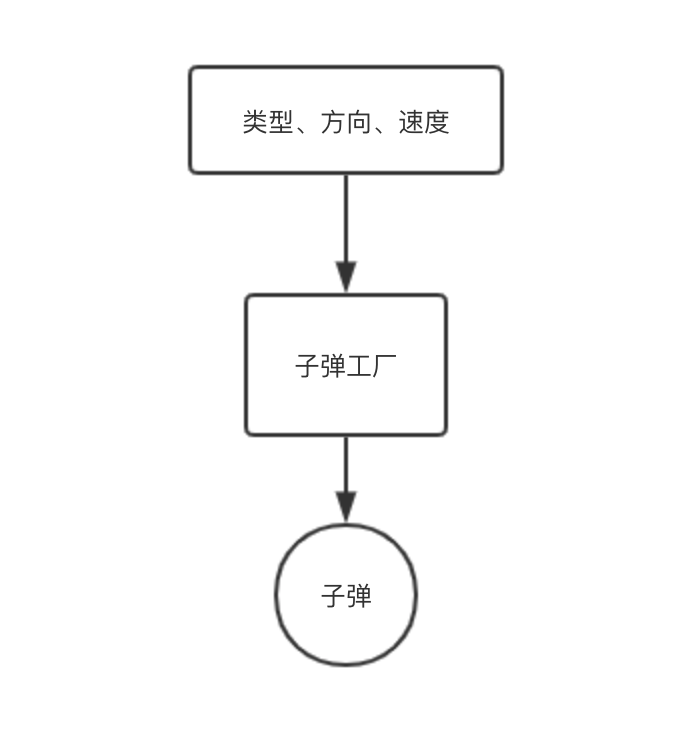
简单子弹工厂 接下来我们就可以封装好子弹的创建方法了:
createBullet (type : BulletType , dir : cc.Vec2 , speed : number ): cc.Node { let bullet : cc.Node | undefined = undefined if (this .bulletPools [type ].size () <= 0 ) { this .bulletPools [type ].put (cc.instantiate (this .bulletPrefab [type ])) } bullet = this .bulletPools [type ].get (this , dir, speed, type ) this .node .addChild (bullet) return bullet }
通过 get 方法来触发子弹的 reuse 方法:
reuse (bulletFactory : BulletFactory , dir : cc.Vec2 , speed : number , tag : BulletType ): void { this .bulletFactory = bulletFactory this .moveSpeed = speed this .tag = tag this .moveDir = dir }
结语 文章第四部分实现了子弹工厂的实现,我们下一部分实现子弹工厂的使用与简单射击工厂。
O(∩_∩)O~~
源码地址
https://github.com/KuoKuo666/Alive