使用环境参考
Node.js v16.19.1
VSCode 插件:Live Server
正文
初始化新工程
安装好 node 环境后,新建一个空项目文件夹,执行 npm init 一路回车即可。
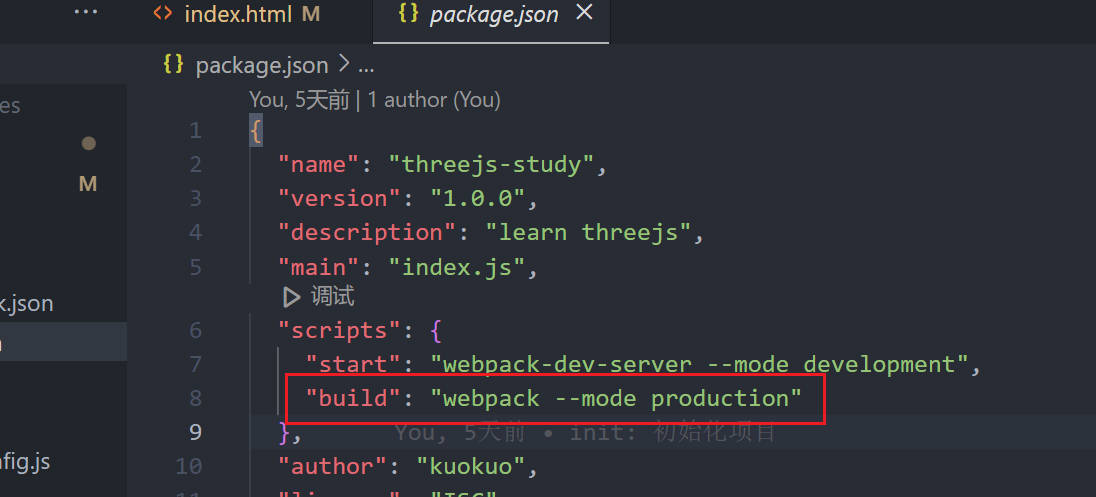
然后配置 npm 所需要的包,直接列一下 package.json
{
  "name": "threejs-study",
  "version": "1.0.0",
  "description": "learn threejs",
  "main": "index.js",
  "scripts": {
    "start": "webpack-dev-server --mode development",
    "build": "webpack --mode production"
  },
  "author": "kuokuo",
  "license": "ISC",
  "devDependencies": {
    "@types/node": "^18.15.11",
    "@types/three": "^0.150.1",
    "html-webpack-plugin": "^5.5.0",
    "ts-loader": "^9.4.2",
    "typescript": "^5.0.4",
    "webpack": "^5.79.0",
    "webpack-cli": "^5.0.1",
    "webpack-dev-server": "^4.13.2"
  },
  "dependencies": {
    "three": "^0.151.3"
  }
}
|
然后执行 npm i 即可。
如果有版本控制 git,记得配置一下 .gitignore 把 node_modules 忽略了,如下新建文件:
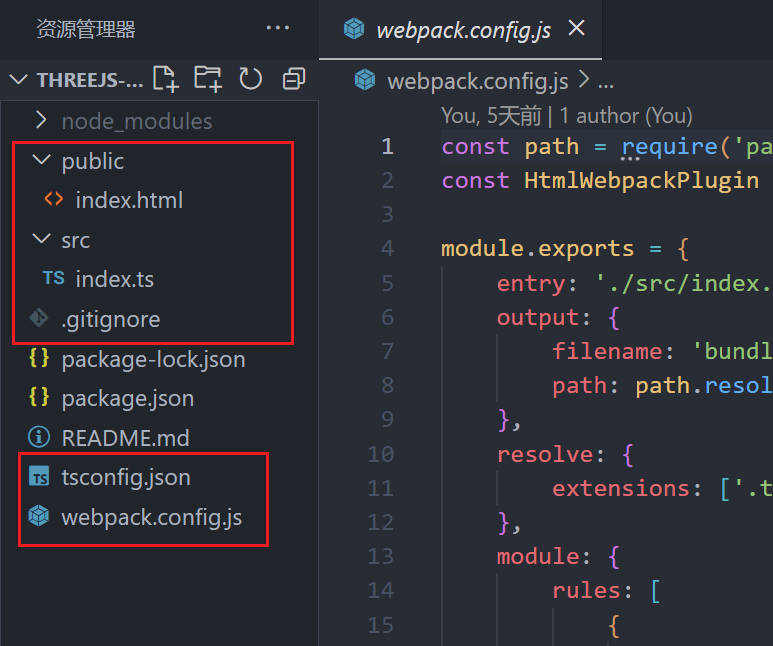
tsconfig.json
{
  "compilerOptions": {
    "target": "ES5",
    "module": "ES6",
    "sourceMap": true
  }
}
|
webpack.config.js
const path = require('path')
const HtmlWebpackPlugin = require('html-webpack-plugin')

module.exports = {
  entry: './src/index.ts',
  output: {
    filename: 'bundle.js',
    path: path.resolve(__dirname, 'dist'),
  },
  resolve: {
    extensions: ['.ts', '.js'],
  },
  module: {
    rules: [
      {
        test: /\.ts$/,
        use: 'ts-loader',
        exclude: /node_modules/,
      },
    ],
  },
  devServer: {
    static: path.join(__dirname, 'public'),
    compress: true,
    port: 9000,
  },
  plugins: [
    new HtmlWebpackPlugin({
      template: './public/index.html',
    }),
  ],
}
|
一个空的 html 文件,在 public 目录下
<!DOCTYPE html>
<html lang="en">
  <head>
    <meta charset="UTF-8" />
    <meta http-equiv="X-UA-Compatible" content="IE=edge" />
    <meta name="viewport" content="width=device-width, initial-scale=1.0" />
    <title>Document</title>
  </head>
  <body></body>
</html>
|
HelloWorld
最重要的来了,在 src 下新建 index.ts
import * as THREE from 'three'
const scene = new THREE.Scene()
const camera = new THREE.PerspectiveCamera(75, window.innerWidth / window.innerHeight, 0.1, 1000)
const renderer = new THREE.WebGLRenderer()
renderer.setSize(window.innerWidth, window.innerHeight)
document.body.appendChild(renderer.domElement)
const geometry = new THREE.BoxGeometry()
const material = new THREE.MeshBasicMaterial({ color: 0x00ff00 })
const cube = new THREE.Mesh(geometry, material)
scene.add(cube)
camera.position.z = 5
const animate = () => {
requestAnimationFrame(animate)
cube.rotation.x += 0.01
cube.rotation.y += 0.01
renderer.render(scene, camera)
}
animate()
window.addEventListener('resize', () => {
camera.aspect = window.innerWidth / window.innerHeight
camera.updateProjectionMatrix()
renderer.setSize(window.innerWidth, window.innerHeight)
})
|
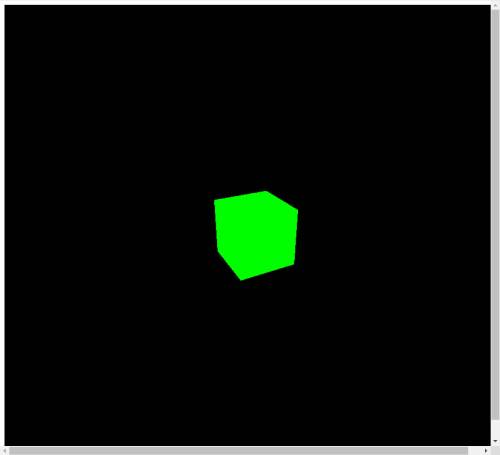
OK,一个 Three 的 HelloWorld 就搞定了。
npm run start 进行预览吧。
在浏览器中输入 localhost:9000
打包发布
使用 webpack 进行打包发布,命令在 package.json 里已经写好了:
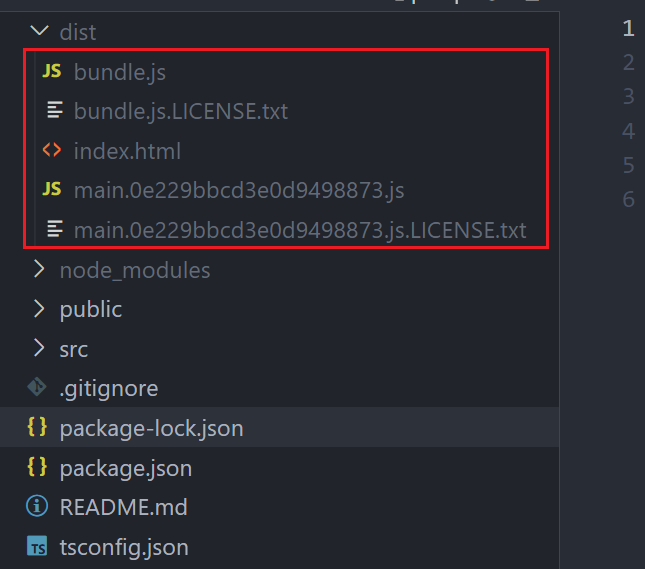
执行 npm run build 你就可以获得打包后的 dist 目录,这个目录就可以放到服务器上了。
本地预览使用 Live Server 插件,默认在 5500 端口。
解决资源缓存
一般来说,为了项目发布后的再次更新会有缓存问题,项目打包时会为资源(js、图片等)打上 md5 这种不一致尾缀,这样就不会有缓存问题了。
在 webpack 中有开箱即用的写法,在 webpack.config.js 中修改:
output: {
filename: '[name].[fullhash].js',
path: path.resolve(__dirname, 'dist')
},
|
但是这样打包后的哈希串太长了,改为 [name].[fullhash:7].js,限制长度。
然后还需要解决两个问题,一个是不需要的 license 注释文件,一个是每次打包 dist 需要手动清理。
webpack5 新增了 clean 字段非常方便,然后注释文件可以通过修改配置不一起打包。
最终的 webpack.config.js 文件
const path = require('path')
const TerserPlugin = require('terser-webpack-plugin')
const HtmlWebpackPlugin = require('html-webpack-plugin')

module.exports = {
  entry: './src/index.ts',
  output: {
    filename: '[name].[fullhash:7].js',
    path: path.resolve(__dirname, 'dist'),
    clean: true,
  },
  resolve: {
    extensions: ['.ts', '.js'],
  },
  module: {
    rules: [
      {
        test: /\.ts$/,
        use: 'ts-loader',
        exclude: /node_modules/,
      },
    ],
  },
  devServer: {
    static: path.join(__dirname, 'public'),
    compress: true,
    port: 9000,
  },
  plugins: [
    new HtmlWebpackPlugin({
      template: './public/index.html',
    }),
  ],
  optimization: {
    minimize: true,
    minimizer: [
      new TerserPlugin({
        extractComments: false,
      }),
    ],
  },
}
|
打包一下,只有 index.html main.xxxxxx.js 真清爽!!!
课后作业
- 搞明白
fullhash chunkhash contenthash 的区别。
- 如果 webpack4 怎么清除 dist 目录,不用插件呢?
更多文章与分享
Three 学习项目链接:https://github.com/KuoKuo666/threejs-study
个人网站:www.kuokuo666.com
2023!Day Day Up!